> ## Documentation Index
> Fetch the complete documentation index at: https://docs.4096bytes.com/llms.txt
> Use this file to discover all available pages before exploring further.
# Codex
> 在 Codex CLI 中配置 4096bytes 接入参数
Codex CLI 可以通过 OpenAI 兼容 Provider 接入 4096bytes。你需要把控制台生成的 `config.toml` 和 `auth.json` 写入 Codex 配置目录。
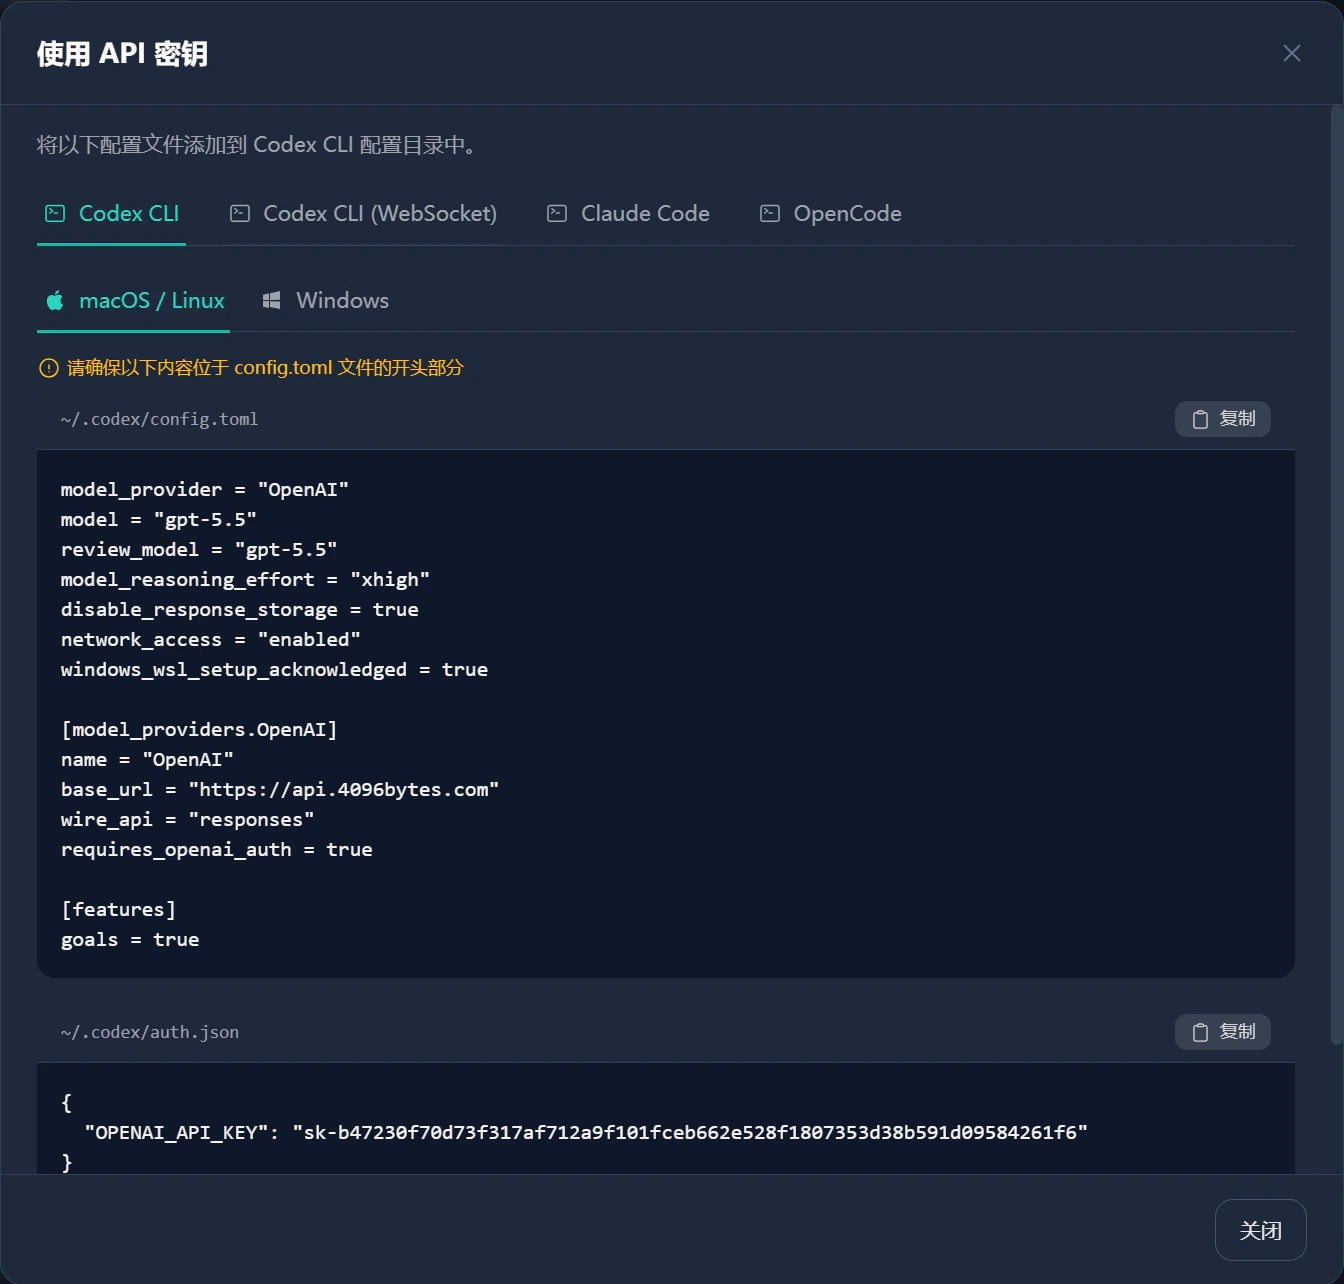
推荐从控制台的 **使用密钥** 弹窗复制配置。弹窗会按系统给出对应文件路径,并自动带入当前 API Key。
## 准备工作
* 已完成 [创建账号](/quickstart/create-account)。
* 已完成 [获取 API Key](/quickstart/get-api-key)。
* 已安装 Codex CLI,并确认 `codex --version` 可以正常运行。
* 已从控制台打开目标 API Key 的 **使用密钥** 弹窗。
`auth.json` 中的 API Key 是明文保存的本机凭证。不要把 `~/.codex/auth.json`、截图或终端输出提交到仓库,也不要发到聊天工具里。
## 安装客户端
如果你还没有安装 Codex CLI,请先参考 [OpenAI Codex GitHub 仓库](https://github.com/openai/codex) 的最新说明。
macOS 或 Linux 可以使用官方安装脚本:
```bash theme={null}
curl -fsSL https://chatgpt.com/codex/install.sh | sh
```
Windows PowerShell 可以使用:
```powershell theme={null}
powershell -ExecutionPolicy ByPass -c "irm https://chatgpt.com/codex/install.ps1 | iex"
```
如果你更习惯用包管理器,也可以使用 npm:
```bash theme={null}
npm install -g @openai/codex
```
安装完成后,重新打开终端并确认命令可用:
```bash theme={null}
codex --version
```
## 从控制台复制配置
打开控制台,进入 **API 密钥** 页面。
找到要给 Codex 使用的 Key,点击 **使用密钥**,然后选择 **Codex CLI**。
按你的电脑选择 **macOS / Linux** 或 **Windows**。控制台会显示对应配置文件路径。
复制 `config.toml` 和 `auth.json` 两段内容。`config.toml` 需要放在文件开头,避免被旧配置覆盖。
 ## macOS 或 Linux
### 写入 `config.toml`
打开或创建 `~/.codex/config.toml`,把下面内容放到文件开头。
```toml theme={null}
model_provider = "OpenAI"
model = "gpt-5.5"
review_model = "gpt-5.5"
model_reasoning_effort = "xhigh"
disable_response_storage = true
network_access = "enabled"
windows_wsl_setup_acknowledged = true
[model_providers.OpenAI]
name = "OpenAI"
base_url = "https://api.4096bytes.com"
wire_api = "responses"
requires_openai_auth = true
[features]
goals = true
```
`model` 和 `review_model` 请使用控制台展示的模型名。如果控制台给出的模型名不同,以控制台为准。
### 写入 `auth.json`
打开或创建 `~/.codex/auth.json`,写入下面内容。
```json theme={null}
{
"OPENAI_API_KEY": "YOUR_4096BYTES_API_KEY"
}
```
把 `YOUR_4096BYTES_API_KEY` 替换为你在控制台创建的 API Key。
### 启动 Codex
保存两个文件后,重新打开终端并运行:
```bash theme={null}
codex
```
也可以先运行一个低风险任务:
```bash theme={null}
codex "请用一句话说明当前目录的用途,不要修改文件"
```
## Windows
### 写入 `config.toml`
打开或创建下面这个文件:
```text theme={null}
%USERPROFILE%\.codex\config.toml
```
把下面内容放到文件开头。
```toml theme={null}
model_provider = "OpenAI"
model = "gpt-5.5"
review_model = "gpt-5.5"
model_reasoning_effort = "xhigh"
disable_response_storage = true
network_access = "enabled"
windows_wsl_setup_acknowledged = true
[model_providers.OpenAI]
name = "OpenAI"
base_url = "https://api.4096bytes.com"
wire_api = "responses"
requires_openai_auth = true
[features]
goals = true
```
如果你在 WSL 中运行 Codex,请配置 WSL 用户目录下的 `~/.codex/config.toml`,不要只改 Windows 用户目录。
### 写入 `auth.json`
打开或创建下面这个文件:
```text theme={null}
%USERPROFILE%\.codex\auth.json
```
写入下面内容。
```json theme={null}
{
"OPENAI_API_KEY": "YOUR_4096BYTES_API_KEY"
}
```
如果你在 WSL 中运行 Codex,请写入 WSL 用户目录下的 `~/.codex/auth.json`。
### 启动 Codex
保存两个文件后,重新打开 PowerShell 或 Windows Terminal,并运行:
```powershell theme={null}
codex
```
也可以先运行一个低风险任务:
```powershell theme={null}
codex "请用一句话说明当前目录的用途,不要修改文件"
```
## 字段说明
| 字段 | 说明 |
| ---------------------- | ----------------------------------------------------------------------- |
| `model_provider` | 指定 Codex 使用哪个 Provider。这里使用 `OpenAI`,需要和 `[model_providers.OpenAI]` 对应。 |
| `model` | Codex 默认使用的模型名。复制控制台显示的值。 |
| `review_model` | Codex Review 使用的模型名。通常和 `model` 保持一致。 |
| `base_url` | 4096bytes API 地址,填写 `https://api.4096bytes.com`。 |
| `wire_api` | 使用 Responses API 线路,填写 `responses`。 |
| `requires_openai_auth` | 让 Codex 从 `auth.json` 读取 `OPENAI_API_KEY`。 |
| `OPENAI_API_KEY` | 你在控制台创建的 4096bytes API Key。 |
## 常见问题
确认新的配置放在 `config.toml` 文件开头。保存后关闭终端,再重新运行 `codex`。
检查 `auth.json` 是否是合法 JSON。确认 API Key 没有漏字符、换行或多余空格。
`model` 和 `review_model` 必须使用控制台显示的模型名。不要直接复制其他用户截图里的模型名。
确认你运行 Codex 的环境。如果在 WSL 中运行,需要配置 WSL 的 `~/.codex/`,不是 Windows 的 `%USERPROFILE%\.codex\`。
可以保留其他 Provider,但要确认 `model_provider = "OpenAI"` 指向的是 4096bytes 这组 `[model_providers.OpenAI]` 配置。
## macOS 或 Linux
### 写入 `config.toml`
打开或创建 `~/.codex/config.toml`,把下面内容放到文件开头。
```toml theme={null}
model_provider = "OpenAI"
model = "gpt-5.5"
review_model = "gpt-5.5"
model_reasoning_effort = "xhigh"
disable_response_storage = true
network_access = "enabled"
windows_wsl_setup_acknowledged = true
[model_providers.OpenAI]
name = "OpenAI"
base_url = "https://api.4096bytes.com"
wire_api = "responses"
requires_openai_auth = true
[features]
goals = true
```
`model` 和 `review_model` 请使用控制台展示的模型名。如果控制台给出的模型名不同,以控制台为准。
### 写入 `auth.json`
打开或创建 `~/.codex/auth.json`,写入下面内容。
```json theme={null}
{
"OPENAI_API_KEY": "YOUR_4096BYTES_API_KEY"
}
```
把 `YOUR_4096BYTES_API_KEY` 替换为你在控制台创建的 API Key。
### 启动 Codex
保存两个文件后,重新打开终端并运行:
```bash theme={null}
codex
```
也可以先运行一个低风险任务:
```bash theme={null}
codex "请用一句话说明当前目录的用途,不要修改文件"
```
## Windows
### 写入 `config.toml`
打开或创建下面这个文件:
```text theme={null}
%USERPROFILE%\.codex\config.toml
```
把下面内容放到文件开头。
```toml theme={null}
model_provider = "OpenAI"
model = "gpt-5.5"
review_model = "gpt-5.5"
model_reasoning_effort = "xhigh"
disable_response_storage = true
network_access = "enabled"
windows_wsl_setup_acknowledged = true
[model_providers.OpenAI]
name = "OpenAI"
base_url = "https://api.4096bytes.com"
wire_api = "responses"
requires_openai_auth = true
[features]
goals = true
```
如果你在 WSL 中运行 Codex,请配置 WSL 用户目录下的 `~/.codex/config.toml`,不要只改 Windows 用户目录。
### 写入 `auth.json`
打开或创建下面这个文件:
```text theme={null}
%USERPROFILE%\.codex\auth.json
```
写入下面内容。
```json theme={null}
{
"OPENAI_API_KEY": "YOUR_4096BYTES_API_KEY"
}
```
如果你在 WSL 中运行 Codex,请写入 WSL 用户目录下的 `~/.codex/auth.json`。
### 启动 Codex
保存两个文件后,重新打开 PowerShell 或 Windows Terminal,并运行:
```powershell theme={null}
codex
```
也可以先运行一个低风险任务:
```powershell theme={null}
codex "请用一句话说明当前目录的用途,不要修改文件"
```
## 字段说明
| 字段 | 说明 |
| ---------------------- | ----------------------------------------------------------------------- |
| `model_provider` | 指定 Codex 使用哪个 Provider。这里使用 `OpenAI`,需要和 `[model_providers.OpenAI]` 对应。 |
| `model` | Codex 默认使用的模型名。复制控制台显示的值。 |
| `review_model` | Codex Review 使用的模型名。通常和 `model` 保持一致。 |
| `base_url` | 4096bytes API 地址,填写 `https://api.4096bytes.com`。 |
| `wire_api` | 使用 Responses API 线路,填写 `responses`。 |
| `requires_openai_auth` | 让 Codex 从 `auth.json` 读取 `OPENAI_API_KEY`。 |
| `OPENAI_API_KEY` | 你在控制台创建的 4096bytes API Key。 |
## 常见问题
确认新的配置放在 `config.toml` 文件开头。保存后关闭终端,再重新运行 `codex`。
检查 `auth.json` 是否是合法 JSON。确认 API Key 没有漏字符、换行或多余空格。
`model` 和 `review_model` 必须使用控制台显示的模型名。不要直接复制其他用户截图里的模型名。
确认你运行 Codex 的环境。如果在 WSL 中运行,需要配置 WSL 的 `~/.codex/`,不是 Windows 的 `%USERPROFILE%\.codex\`。
可以保留其他 Provider,但要确认 `model_provider = "OpenAI"` 指向的是 4096bytes 这组 `[model_providers.OpenAI]` 配置。